Six Insulation Facts Every Homeowner Should Know
As a homeowner, your home’s energy efficiency greatly depends on the effectiveness of your insulation. This article highlights the important insulation facts that you need to know. Read on to learn how you can take care of air leaks and also keep away mold from your home.
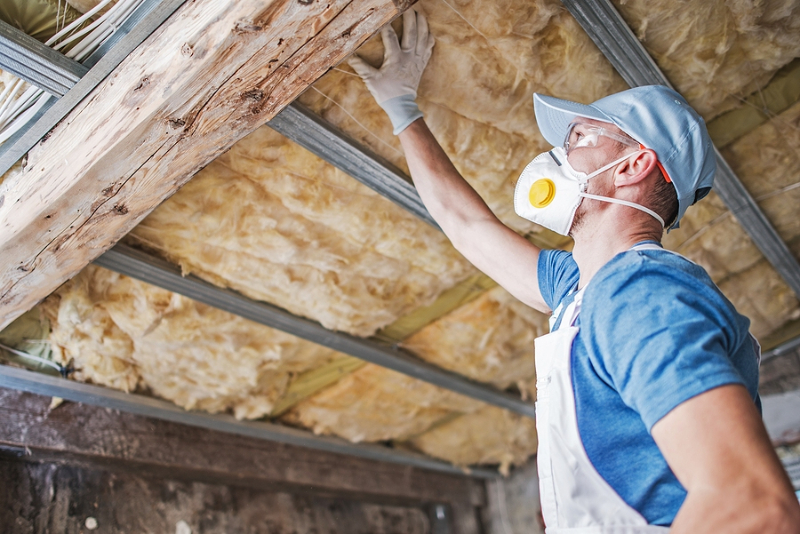
1. Seal Rim Joists
Rim joists are usually responsible for your home loss of heat and air infiltration. As a homeowner, knowing how to air-seal the joists on your own is one of the most vital insulation facts you can have to improve your home’s energy efficiency.
The process is easy and will only take a few hours of your time. You can either use spray foam or hard rigid foam to seal and insulate the rim joists. While spray foam is easy to use, rigid foam is less costly. However, be ready to cut the foam into desired fitting shapes before installing it against the rim joists.
Typically, it is recommended to use foam that is 2 inches thick in humid and cold areas, although you need to find out the ideal thickness recommended for your location. After installing the foam and cutting out any chance of air infiltration, you may add fiberglass insulation to achieve a higher R-value. Be sure to check combustion appliances after sealing the joists to ensure that they are not back drafting as this puts you at risk of carbon monoxide poisoning.
2. Use Mold-Resistant Materials
Mold can wreak havoc to both your house and the health of your loved ones. The key to keeping the mold menace away from your home starts with construction. While preventing mold forever can be next to impossible, using mold-resistant materials when constructing your home is the surest way to stave it off. This is especially true if you are building or repairing an area that has experienced moisture problems before. Remember, you can’t have mold if there is no moisture.
Since mold loves organic materials like wood and paper, you want to minimize these types of materials. If you must ensure the wood you use on your walls is pressure-treated and your drywall is paperless so you can starve any mold that may grow.
Use rigid foam to totally keep away air infiltration that may lead to warm air condensing; resulting in moisture. Fiberglass insulation, as opposed to cellulose, is a better option, although fiberglass backing can be the mold’s source of food. This calls for the use of fiberglass without the backing, the better!
Also, use mold-resistant paint on your walls and sealant on wood, brick, and stucco surfaces to keep away humidity that encourages mold growth. You may have to repaint your surfaces after 5 years as the efficiency of most of the paints can only last that long.
3. Finding Drafts with a Leak Detector
Drafts refer to air leaks caused by gaps in insulation. If you are experiencing drafts in your home, it can be difficult to find out where it comes from. However, the most common places for drafts include windows, electrical outlets and lighting fixtures, chimney, basement, and the attic. Finding out the inlet is crucial in solving the problem, and a leak detector is a handy tool for this job.
Thermal leak detectors work by identifying spots in the house that are either warmer or colder than the rest of the room. You only have to point the battery-powered device to the ceiling, walls or wherever you suspect may be the source of drafts. The leak detector will indicate either red or blue for warm and cold temperatures respectively.
The difference in temperatures shows that there is an air infiltration or the insulation is not working optimally. While the detector is only good at identifying possible problem areas, you will have to figure out the root cause of the drafts so you can have it fixed as soon as possible.
Other than the thermal leak detector, you can also use an incense stick or a candle on a windy day. Shut all the openings and appliances that may cause air movement, then light the incense stick or candle. If the smoke or flame gets blown or sucked in at particular areas of your home, then you have yourself an air leak that needs to be fixed.
4. Never Stuff Insulation
It may look like the more insulation you have, the better your home’s energy efficiency. However, you don’t want to force huge chunks of batts into small spaces in an attempt to achieve better insulation. Stuffing insulation batts will force you to crumple them so they can fit, which results in air pockets that jeopardize its efficiency.
What’s more, you reduce the R-value of your insulation when you compress it. Insulation is usually fluffy due to the trapped air in it that aids in insulation and packing it too tight forces the air out, reducing its ability to resist heat flow. Instead of stuffing, get your measurements right and cut insulation batts into smaller sizes that fit into whatever space needs to be insulated.
5. Finding the Gaps
The gaps filling your attic with hot air are at most times invisible as they are deep under insulation. They usually occur around chimneys, electrical fixtures, and the lower parts of the ceiling. Before climbing up into your attic, ensure you have a clear picture of it to make locating the gaps easy.
To identify the gaps, close all the windows and doors and turn on the fan so that air gets blown into the house. While in the attic with the hatch closed, you will be able to notice air leaks by feeling the air being blown through by the fan. You can even see insulation being moved about by the breeze.
Another way of finding gaps is by looking out for dirty insulation. As air passes through the insulation, it gets filtered by the insulation fibers, leaving a residue of dirt on the material. Water stains on the insulation during hot seasons and frosty spots during cold areas are also evidence of gaps. This is because, during warm months, warm air condenses into droplets when it comes in contact with the cold attic air, staining insulation. The same is also true for cold seasons, only that the water is frozen resulting in frosty areas on the insulation material.
6. Seal Small Attic Holes and Gaps with Foam and Caulk
After successfully identifying the holes and gaps responsible for air leaks, you need to have them sealed as soon as possible. For small attic holes, gaps, and cracks between the drywall and wood plate, use caulk or foam to seal them.
Since expanding foam can be sticky and hard to get off when it sticks, wear gloves and be careful when working with it to minimize the chances of it sticking to your clothes or skin. After you’ve done the sealing, wait for it to dry before covering the area with insulation.
When you have insulation facts at your fingertips, you are more equipped to deal with any insulation issues that may jeopardize the comfort of your home.